Tiles, whether they are porcelain or ceramic, can add a touch of elegance and functionality to any space. From bathrooms to kitchens, these tiles provide both aesthetics and durability. However, the prospect of drilling through tiles can be daunting when it comes to making holes for mounting fixtures or installing new hardware. The fear of cracking the tile often holds people back. But fear not! You can successfully drill through tiles without a single crack with the right tools and techniques. This guide will walk you through the step-by-step process, ensuring your DIY project goes off without a hitch.
What Will You Need?
Before you begin, gathering all the necessary tools and materials is essential. Here’s what you’ll need:
- Tiles: Porcelain or ceramic tiles, whichever you’re working with.
- Drill Bit for Tiles: Invest in a high-quality diamond-tipped or carbide-tipped drill bit specifically designed for tiles. This is crucial to prevent cracking.
- Painter’s Tape: This will help prevent the drill bit from slipping and provide additional protection to the tile’s surface.
- Cordless Drill: Opt for a cordless drill to ensure ease of movement and avoid the hassle of cords tangling.
- Safety Gear: Safety goggles and gloves are essential to protect your eyes and hands from debris. In addition to that, you can also wear personal protective equipment to ensure that debris doesn’t hurt you.
Step-by-Step Guide
Now that you have your tools ready let’s delve into the step-by-step process of drilling through tiles without the fear of cracking.
Step 1: Mark the Spot. Identify the precise spot where you need to drill the hole. Use a pencil or a marker to make a clear and visible mark on the tile’s surface.
Step 2: Apply Painter’s Tape. Place a piece of painter’s tape over the marked spot. This serves multiple purposes: it acts as a visual guide, helps prevent the drill bit from slipping, and reduces the chances of the tile chipping or cracking during drilling.
Step 3: Choose the Right Drill Bit. Select the appropriate drill bit for your tile. Diamond-tipped or carbide-tipped bits are specifically designed for tiles and will provide the best results. The bit size should match the diameter of the hole you require.
Step 4: Set Up Your Cordless Drill. Insert the chosen drill bit into your cordless drill. Make sure it’s securely in place. If your drill has multiple speed settings, opt for a lower speed. This will prevent the bit from overheating or skidding on the tile’s surface.
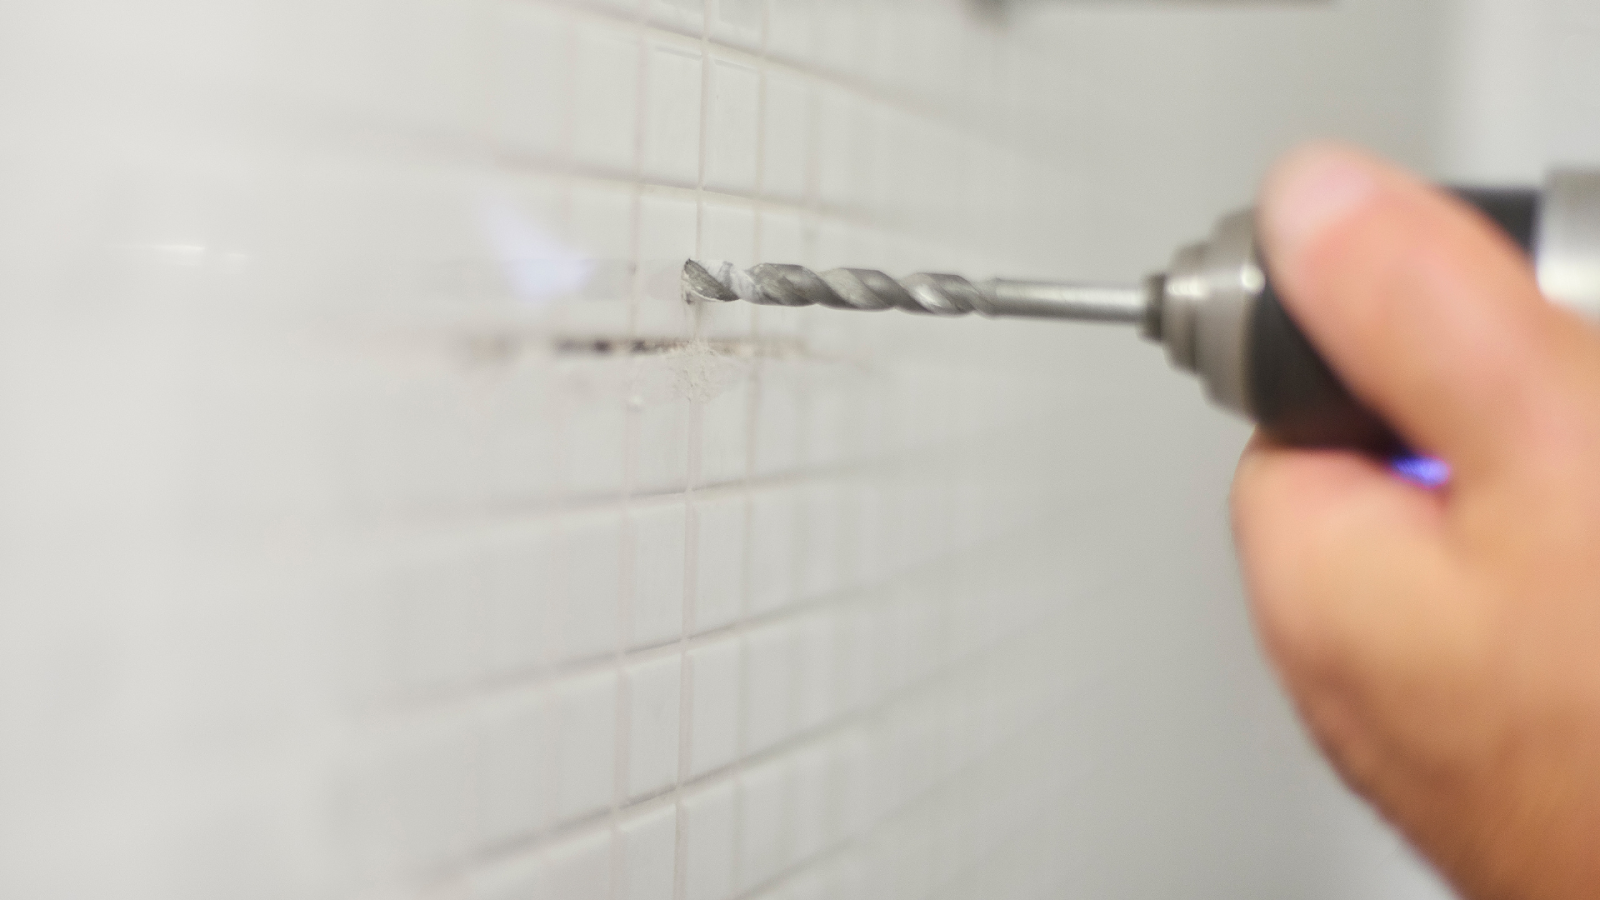
Step 5: Start Drilling. Place the drill bit’s tip directly over the marked spot on the painter’s tape. Hold the drill perpendicular to the tile’s surface. Apply gentle and consistent pressure as you start the drill. Let the drill bit do the work; there’s no need to force it. The key is to be patient and maintain a steady hand.
Step 6: Keep the Surface Cool To prevent overheating and ensure a smooth drilling process, periodically dip the drill bit in water. This will keep the temperature down and prolong the life of the bit.
Step 7: Drill Slowly As you drill, maintain a slow and steady pace. The drilling process may take longer than drilling through other materials, but this caution will significantly reduce the risk of cracking.
Step 8: Approach the Backing Surface: As the drill bit breaks through the tile, adjust the drill to a slightly higher speed. Continue drilling until you reach the backing surface. At this point, you can remove the painter’s tape.
Step 9: Finalise the Hole Once the hole is drilled, remove the drill bit from the hole and your cordless drill. Use a soft cloth to wipe away any debris or dust.
Step 10: Safety First Finally, always prioritise safety. Wear your safety goggles and gloves throughout the drilling process to protect yourself from potential hazards.
Drilling through tiles might seem intimidating, but armed with the right tools and following these step-by-step instructions, you can achieve professional-looking results without any cracks or mishaps. So, confidently tackle your next DIY project that involves drilling through porcelain or ceramic tiles. You’ll be amazed at what you can accomplish with patience and care!