Replacing a molded plug on a device can be safe if done correctly, but it’s important to exercise caution and follow the appropriate procedures to ensure safety. Here are some quick steps you can follow :
- Turn off and unplug the device.
- Get a new plug, screwdriver, and wire strippers if needed.
- Check new plug compatibility and quality.
- Identify wires: ground (green/bare), neutral (white/gray), live/hot (black/red).
- Cut off the old plug, leaving a wire.
- Strip wire ends.
- Attach wires to new plug terminals: ground to green, neutral to silver, live to gold.
- Secure connections with screws.
- Assemble plug casing.
- Test device.
- Check work for safety and correctness.
How Can You Prepare for Replacement?
Efficiently replacing a molded plug demands a systematic approach that encompasses safety measures,
Turn off and unplug the device:
Before starting any electrical work, it’s crucial to ensure the device is completely powered off and unplugged from the electrical outlet. Additionally, this prevents any risk of electric shock or accidental activation while working on the plug.
Gather necessary tools: new plug, screwdriver, wire strippers:
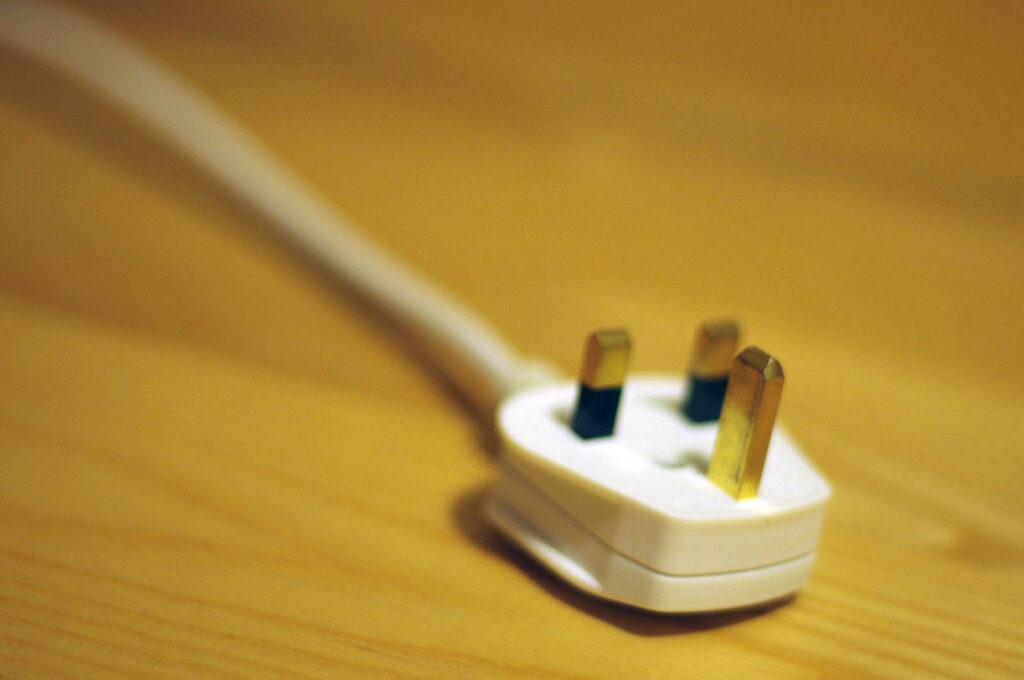
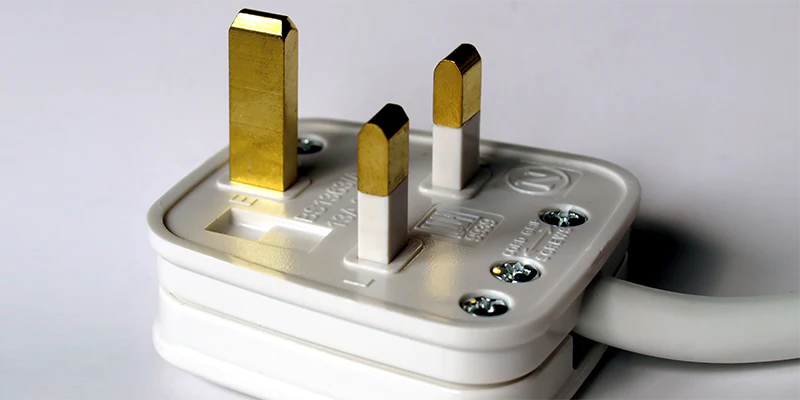
- New Plug: Firstly, choose a new plug that matches the requirements of your device. It should be appropriate for the voltage and current ratings of the device. Ensure that the plug is designed for the specific type of socket in your region (e.g., Type A, Type B, Type C, etc.).
- Screwdriver: Then, select a screwdriver that fits the screws on the plug casing. This will help you disassemble the old plug and assemble the new one securely.
- Wire Strippers: However, if the new plug doesn’t come with pre-stripped wires, you’ll need wire strippers to remove a small section of insulation from the ends of the wires. This step is critical for making proper connections.
How Can You Choose the Right Plug?
Selecting the ideal plug involves a discerning process of evaluating voltage compatibility.
Ensure compatibility with device’s voltage and current:
- Voltage Compatibility: Different regions have different voltage standards (e.g., 120V in North America, 230V in Europe).
Moreover, ensure that the new plug is rated for the voltage used in your region to avoid electrical issues and potential damage to your device.
- Current Rating: The plug must be able to handle the maximum current that the device draws.
Additionally, check the device’s specifications or user manual for its current requirements and choose a plug that matches or exceeds this rating.
Verify plug quality and safety standards:
- Certifications: Look for recognized certifications and markings on the plug, such as CE, UL, or similar symbols. These certifications indicate that the plug has undergone testing and meets safety standards.
- Build Quality: Inspect the plug for signs of quality construction. Sturdy materials and well-molded components contribute to the durability and safety of the plug.
- Insulation: Ensure that the plug provides proper insulation between the wires and the plug casing. This prevents accidental contact with live wires, reducing the risk of shocks.
- Manufacturer Reputation: Opt for plugs from reputable manufacturers known for producing safe and reliable electrical components.
What Are The Process Of Identifying and Handling Wires?
Effectively identifying and managing wires encompasses a methodical process of color coding interpretation, proper labeling, organized bundling.
Recognize wire colors:
- Ground Wire (Green/Bare): This wire is a safety feature that provides a path for electrical current to safely dissipate into the ground in the event of a fault. It’s typically green or bare and must be connected to the grounding terminal to ensure electrical safety.
- Neutral Wire (White/Gray): The neutral wire carries current back to the electrical supply after it has been used by the device. It’s usually white or gray and should be connected to the neutral terminal.
- Live/Hot Wire (Black/Red): The live wire carries current from the electrical supply to the device. It’s often black or red and connects to the live terminal. This wire carries the highest potential danger and should be handled with care.
Use multimeter if colors are unclear:
If the wire colors are not clearly marked or you’re unsure about their identification, using a multimeter can help determine which wire is which.
In addition, multimeters can measure voltage and continuity, allowing you to identify live, neutral, and ground wires accurately.
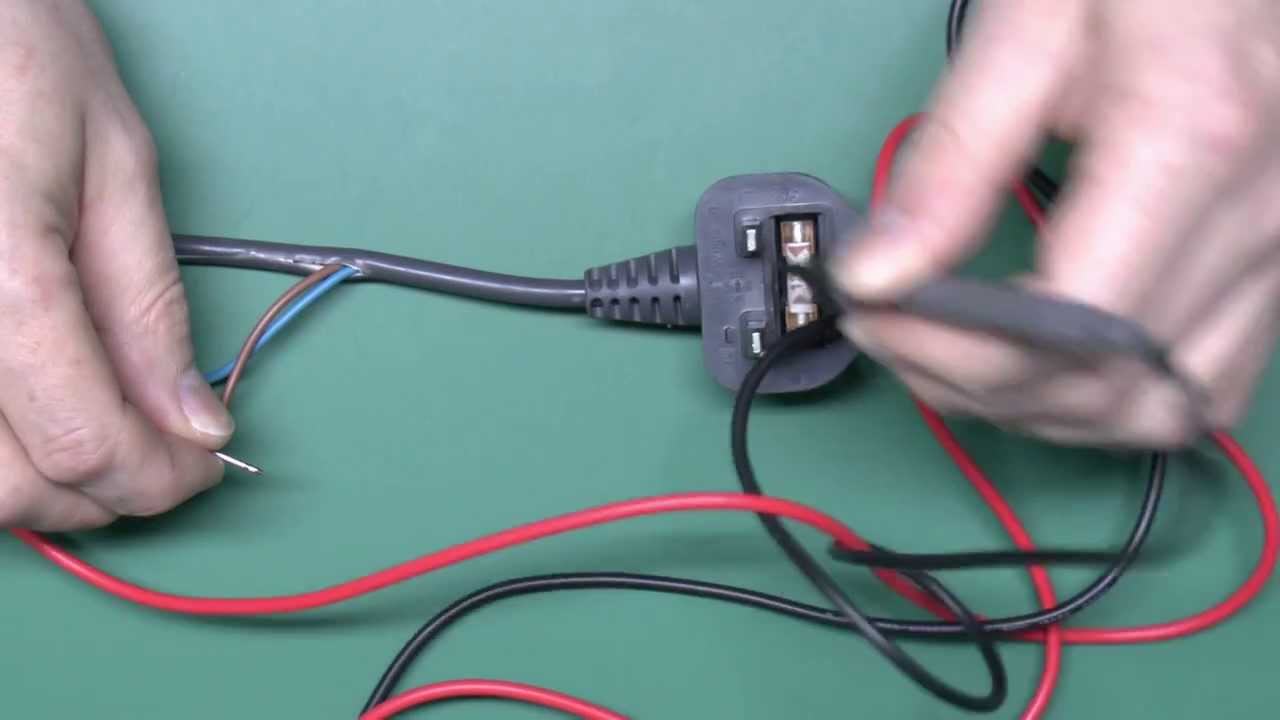
Cut off old plug, leaving enough wire for connection:
When removing the old plug, ensure you leave a sufficient length of wire attached to the device. Moreover, this gives you room to work with when connecting the wires to the new plug.
However, avoid leaving excess wire, as it can create unnecessary clutter and make the connections harder to manage.
Carefully strip wire ends:
Using wire strippers, carefully remove a small section of insulation from the ends of the wires. Be cautious not to nick or damage the wire strands underneath.
Moreover, properly stripped wires ensure good contact when attaching them to the terminals on the new plug.
How to Connect Wires to New Plugs?
Seamlessly connecting wires to new plugs necessitates a systematic procedure, encompassing stripping insulation, proper terminal placement, secure fastening, and thorough testing
Attach ground wire to green terminal:
Connect the ground wire (green or bare) to the designated grounding terminal on the new plug. The grounding terminal is typically labeled or marked with a symbol. Secure the wire by tightening the screw to ensure a solid connection. The ground connection is crucial for preventing electric shock and maintaining safety.
Connect neutral wire to silver terminal:
Attach the neutral wire (white or gray) to the silver terminal, often labeled “N” or “Neutral.” Tighten the screw to establish a secure connection. The neutral wire completes the circuit and ensures proper functioning of the device.
Secure live/hot wire to gold terminal:
Connect the live wire (black or red) to the gold terminal, usually marked “L” or “Live.” Ensure the connection is tight and secure. This wire carries the current to power the device, so it’s essential to have a proper connection to prevent overheating or other electrical issues.
How Can You Secure Connections?
Ensuring robust and lasting connections demands a meticulous approach, including proper crimping techniques.
Tighten screws to ensure firm connections:
After attaching the wires to their respective terminals, it’s important to tighten the screws securely.
Moreover, a firm connection reduces the risk of loose wires that can lead to sparks, heat buildup, or even electrical arcing. However, avoid over-tightening, which could damage the wires or terminals.
Inspect for any exposed wires outside terminals:
Carefully examine each terminal after tightening the screws. Ensure that no bare wire is exposed beyond the terminal or screw head. Furthermore, exposed wires can pose a serious safety risk, potentially causing short circuits or electric shock.
However, if you find any exposed wire, trim it to the appropriate length and strip the insulation again before re-securing it.
What Is The Process Assembling the New Plug?
Place the wires and terminals into their designated sections of the new plug casing. Ensure that the wires are neatly arranged and not pinched or twisted.
Moreover, proper arrangement helps prevent strain on the wires and maintains a clean internal layout.
Secure any screws holding the casing:
Before fully assembling the plug casing, secure any screws or clips that hold the casing together.
Make sure that the casing fits snugly around the wires and terminals, and there are no gaps or misalignments.
In addition, properly secured casing prevents accidental exposure to live components and protects the internal connections.
During the process of securing connections and assembling the plug, attention to detail is essential.
Taking the time to perform these steps meticulously ensures not only the safety of the electrical connections but also the long-term reliability of the device.Rushing through this stage could lead to potential hazards or premature failure of the plug.
How Can You Test The Connection?
Before testing, ensure that the power source you’re using is safe and properly grounded. Moreover, using a power outlet with residual current devices (RCDs) or ground fault circuit interrupters (GFCIs) adds an extra layer of protection against electrical faults.
Ensure device functions properly:
After plugging the device into the power source, turn it on and test its functionality. Check if all functions are working as expected.
Listen for any unusual sounds, smell for any burning odors, and visually inspect the device while it’s operational.
However, if the device doesn’t function as it should or shows any signs of malfunction, immediately unplug it and revisit your connection work.
What Are The Final Inspections?
Thoroughly examine the plug and the device for any signs of exposed wires, loose connections, or issues with the assembly. In addition, pay close attention to the areas around the terminals, as well as the casing of the plug. Even a small exposed wire can lead to dangerous situations, so this inspection is critical.
Prioritize safety and correctness:
Emphasize safety and correctness throughout this process. Double-check your work and ensure that all wires are correctly connected to their respective terminals.
Make sure the casing is securely closed and that no wires are pinched or strained. Avoid shortcuts that could compromise the safety of the plug and device.
When Is the Best Time To Seek Professional Help?
If you have any doubts about your ability to complete the plug replacement safely and correctly, it’s best to seek help from a professional electrician.
Furthermore, electrical work carries inherent risks, and an electrician can ensure that the replacement is done in compliance with electrical codes and safety standards.
Avoid hazards associated with incorrect installation:
Incorrectly installed plugs can lead to a range of hazards, including electrical shock, fires, and damage to devices.
Seeking professional help minimizes these risks and ensures the safety of both you and your electrical system.
FAQ’s
Can you replace a Molded plug on a washing machine?
Yes, you can replace a molded plug on a washing machine following proper safety procedures and electrical knowledge.
Why do appliances have Molded plugs?
Appliances have molded plugs for safety, as they provide insulation, protection from electrical hazards, and standardized connections.
Can you cut off a Moulded plug?
Yes, cutting off a molded plug is possible, but it requires careful handling and knowledge to rewire and attach a new plug correctly.
Are Moulded plugs mandatory?
Molded plugs are not always mandatory, but they are commonly used due to their safety advantages and convenience.
Can a Molded plug be opened?
No, molded plugs are usually sealed and not designed to be opened easily. Attempting to open them could compromise safety and functionality.
Do Molded plugs have fuses?
Some molded plugs may have built-in fuses, providing additional protection against electrical faults. However, not all molded plugs have this feature.
Final Thought
In conclusion, the process of safely replacing a molded plug involves a series of meticulous steps to ensure both functionality and safety.
From preparing for the replacement to identifying wires, connecting them to the new plug, and securing connections, each stage demands attention to detail and adherence to safety standards.
Assembling the plug correctly and thoroughly testing its functionality are vital steps to guarantee its effectiveness.
Conducting a final inspection to check for exposed wires, loose connections, and any assembly issues underscores the commitment to safety and correctness.
Moreover, emphasizing the importance of seeking professional help when uncertain about electrical work can greatly mitigate risks associated with incorrect installations.
Ultimately, whether replacing a plug or engaging in any electrical work, prioritizing safety remains paramount.